Wednesday, June 15, 2011

Australian & New Zealand Revit Standards Released


After a mammoth effort beginning way back at the 2009 Revit Technology Conference in Melbourne 2 years ago, an official document of standards and guidelines for Revit Content has been released to the public

For full details jump onto the website, where you can also download the document by submitting your details,  which will then be kept for future updates of the document to be sent out


http://www.anzrs.org/blog/

This document release is the first stage of the process of creating a usable & transparent ANZ standard for content creation

The document contains a few key sections, which at this stage focus mainly on content creation

  • An overview of content requirements outlining the use of content
  • Content compliance (minimum requirements to meet ANZRS standards
  • Advanced Features and Best Practices (additional optional requirements)
  • Recommended shared parameters (including downloadable files)
 It will certainly be interesting to see how the industry reacts to this document, particularly with the growing movement towards collaboration projects with multiple consultants/parties

The next stage is more input from the industry to really refine the guidelines through project use in the industry, so get onto the website and get hold of the document

Monday, May 30, 2011

RTC 2011 Wrapup

A huge few days up at the Gold Coast for the 2011 RTC conference is over

Each year this event seems to get bigger and better, with a reported 450 delegates attending the conference, which is 50% up on last years conference. A huge increase in numbers

The days blurred into nights, with classes throughout the day, and functions into the night. Being at the Gold Coast I had ideas of afternoons in the sun but in reality I actually never left the conference venue while the sun was still up.

Luckily the Jupiters complex had everything we needed;

View from my hotel room


The conference itself went smoothly from start to finish, with RTC putting on a well organised event once again

This year the trend seemed to be "Coordination" & "Communication" with a number of the talks resulting in these themes. The bottom line seemed to be that Consultants, Contractors & Clients need to do more of both to take Revit & BIM to the next level over the next twelve months

I presented just one class this year, which happened to be first day this year, which was a relief following last years two sessions including a class in the final session on the final day. The class was well attended, with close to a full room. Unfortunately I started off with a few technical hitches with the display monitor dieing leaving me to present directly from the projector screen, Certainly not ideal!

Once again the RTC has proven to be a must attend event, I look forward to seeing the results and feedback of the RTC North America event in less than 4 weeks time and whether RTC can stamp its dominance on AU's doorstep!

Now to get some sleep!

Thursday, April 21, 2011

Quick update

Time is flying past again, Revit Technology Conference - Gold Coast fast approaching in a few short weeks, only one talk for myself this year with an in-depth look at the settings and options of Structural Families. My content is mostly complete, with just some new 2012 features to add into the class. Really looking forward to a number of longer LAB sessions this year, which should really add some value to the event


With the new job in the past 2 months an entry for the competition was looking tough, but just last week a very interesting bid submission has come up which in a few short days has produced some exciting stuff which hopefully I may be able to present, depending on approval from the other parties involved

Which brings me to this cool video by Zach over at Buildz, if you are not checking out Zach's blog then you better add it to your list

The video is a great overview of what is possible when working with conceptual design and prototyping straight to a 3D printer


Seriously cool stuff!

Wednesday, April 6, 2011

Navisworks 2012

There doesn't seem to be as much information out there on the new features of Navisworks 2012, Revit is on every blog but Navisworks doesn't seem to have much of the spotlight.  Autodesk has currently been running their ADSKAEC event which is otherwise known as Media Day/s where they give more in depth information on all their upcoming products, and a few interesting Navisworks features caught my attention


I have been using Navisworks quite a bit lately, and something that has really annoyed me is the clumsiness of setting up timeliner animations. Particularly for preliminary presentations, setting and altering the dates can be time consuming. But all along there is a Gaant chart sitting there on one of the panels which is read only and cant be edited...

Inage from Autodesk (Gaant chart on the right)
Well 2012 will now let us interactively alter the timeline through the Gaant chart, this should really make editing timeline animations a lot more interactive. Cant wait to test out how this functions.

The other item that sparked my interest was the introduction of Navisworks being compatible with multi-sheet DWFx files. Currently you need to switch back to Design Review if you want to review a multi sheet set of documents, well now everything can be done straight in Navisworks. I am yet to test the functionality, but it looks like Navisworks will have the full review capabilities to markup drawings as well, which should be great to keep all in piece of software

There are quite a few other new features as well, check out more info here http://usa.autodesk.com/navisworks/features/

Friday, April 1, 2011

Structural Trusses with the Revit Truss Tool - Simple Truss

So the Revit Truss tool universally gets a pretty bad wrap, I would agree that it isn't living up to its expectation. But like a lot of tools in Revit if you are not using it you are missing out. But for some reason people are happy to miss out..

I have spent a lot of hours with the truss family, and here are some of the things I have learnt

Firstly make sure you understand what you want, and how you want to flex it
  • What is the geometry of this truss
  • Will the truss be a one off
  • If not, will it need to flex and adjust geometry as multiple instances
  • How do you want the truss to display in the project, are you going to detail the truss to a high level with 3D isometrics at connections etc.
The answer to these initial questions will generally send me down 3 paths
  1. A simple non-parametric truss which is prebuilt to approximate dimensions in the truss family
  2. A parametric truss family with in-built parameters and arrays
  3. A framing family which acts like a truss, but is actually a parametric beam/frame
 Path 1 - Non-Parametric Truss

This is the easiest option, and will be suitable for most trusses that dont require the ability to flex and update number of verticals

Truss Example
 So lets consider an example, in the situation above, we could use a parametric family, but if we dont need to flex the bays, there is no point wrestling with formulas and arrays

The first thing to remember with trusses in Revit, is we don't need to build the angle into the truss, Revit already allows us to sketch the angle in the project, and even lets us attach the top chord to the roof plane

I have made a quick video of the steps required to model a truss like this


Finished truss

But the key points for this are
  • No need to constrain the truss linework in the family, the lines will follow the built in reference planes and each other
  • Set the truss length and truss height to approximately the dimensions you require in the project, there is no point building this thing to 20m long if your project actually needs a truss 4m long and 0.6m high
  • Use equalized dimensions to your advantage, you could also easily add an additional reference plane at a third point for example to create an additional setout point with equalised bays in between
  • Once you load the family into the project, make sure you add member types in the type properties first before placing the truss. Revit does funny things if you try and change it afterwards
  • Think about the best way to place this truss in the project, in the example of created a reference plane to setout the bottom chord, and then attached the top chord to the roof. You can also attach trusses to floors, you cannnot attach them to ref. planes, but you can sketch the top chord by editing the profile as well

Well that is a simple non-parametric truss family, next post I will go through a simple parametric truss family


Wednesday, March 30, 2011

Revit 2012 - Construction Modelling & Assembelies

Just a link to some more details on the new Construction Modelling & Assembely features for the upcoming 2012 release. The video has been produced by Autodesk and shows the new features in action


These features will be available for Architecture & Structure

I believe these features will be huge for structural users, and I really look forward to using assemblies on projects. I think being able to more easily schedule and mark groups of components will really benefit documentation workflows

Wednesday, March 23, 2011

Revit Stucture 2012 - New Features

So the details are out, Revit 2012 is on its way...


As usual from the last few years, expect to download your install file from Autodesk sometime early April (2nd week is the guess at the moment) with media copies sent out on request a month or so afterwards

So what are the Revit Structure 2012 new/top features??


So in reality, for structural users we have some enhancements to the Analytical model & to Rebar tools

But IMO the enhancements to the platform in general are highlights for structural users

Some highlights for me:

Lock 3D views & 3D tagging
A new button down on the the view control bar, there will be a button to lock the current 3D view orientation. This will then activate annotation in the 3D view. The view can be unlocked, but annotation will then disappear in the view

Reinforcement Enhancements
Multi-Planar Reinforcement
Reinforcement can be hosted to Generic Models & Structural Connections

Analytical model Enhancements
Much more control over the analytical model, including the ability to easily turn off the analytical model for selected elements. And better built in checking of the model prior to exporting


Assemblies
Assemblies will allow you to take selections of elements which you can then tag & schedule as one assembly There are also built in tools to quickly document assembly components.


Create Parts/Divide Model 
This could be a great new feature, we will be able to divide singular elements into unique parts while still retaining its relationship to the main element. Think multilayered walls where you simply need to divide one layer of the wall

Void family enhancements
Families with voids can now cut multiple instances, even of different categories!


Point Clouds
Can now be linked into a project as an overlay in the background

Manage Links Dialog
Finally, Revit Links can be before CAD links!

Dimension setting Enhancements

Visual Enhancements
Some neat new features like ghosting when selecting objects in 3D view

More details as they arrive!

Monday, March 21, 2011

Revit Architecture 2012

David Light has been busying blogging about the new features for Revit Arch 2012

Check out his write-up here Autodesk Revit Architecture 2012

Revit 2012 - Media Release Details

Some early details on the upcoming 2012 release for Revit suites was brought forward by Autodesk at a webcast press release this morning

From the Autodesk Press Release

Autodesk software products for building design and construction support a more complete BIM
workflow, and includes Autodesk Revit Architecture 2012, Autodesk Revit MEP 2012, Autodesk
Revit Structure 2012 and Autodesk Navisworks 2012 . Enhanced with a new point cloud tool, the
Revit Family of software can now connect directly to laser scans as a part of the BIM process.
Revit-based products are now Citrix XenApp6 ready*, supporting working from remote locations
using a single server, and Revit Server to support collaboration on shared Revit models across a
wide-area network (WAN). Revit Architecture 2012 and Revit Structure 2012 offer a new
construction modeling tool to help users derive better construction insight from design models.
Improved conceptual energy analysis tools** for Revit Architecture 2012 and Revit MEP 2012
help support sustainable design decision-making early in the design process.

Additional AEC software-specific updates include:
·         Autodesk Revit Architecture 2012 enables users to create material appearance libraries to help standardize materials across projects and improve collaboration within the project team. Visualization enhancements give users the ability to display edges with more realistic views and shadows in consistent colors mode.

·         Autodesk Revit Structure 2012 offers analytical model enhancements to help userscreate and manage the structural analytical model, enabling greater control and betterconsistency with the structural physical model. Reinforcement enhancements help usersmore easily define and visualize concrete reinforcement.

·         Autodesk Revit MEP 2012 now enables users create custom systems, assign systems toducts/pipes without requiring them to be connected to equipment, assign color andlinetype by system without filters, as well as see total electrical load, air flow or pipe flowat any point within the system. New placeholders give users the ability to createconceptual level single line ducts and pipes early in the design process, and later convertthem to 3D geometry.


·         Autodesk Navisworks 2012 accelerates BIM project review through integration, analysis,and communication enhancements. File interoperability improvements help boost productivity by supporting workflows between the latest enhancements in Autodesk Revitproducts and third-party applications. New user interface and API (application programming interface) for the Timeliner tool provide greater control and flexibility when working with 4D simulations. New multi-sheet 2D DWF support enables users to open, review and explore 2D data sets alongside 3D models.


This all ties together with the rebranding of the suite packages into the following

·         Standard (AutoCAD)

·         Premium (Adds a Revit Platform)

·         Ultimate (Adds Navisworks or QTO etc.)

More details as they surface!

Exciting times

Wednesday, March 16, 2011

Not so secret NEWS - New Job

So things have been a little quiet on the Blog front of late, the last few weeks have passed in a quick blur..

I have as of last week started in a new position with a Global Engineering and Management Firm as a Revit/BIM Leader within a growing Building Structures team. I will still be based in Melbourne, Australia, but will now have a bigger foundation of colleagues and peers throughout Australia and Internationally to build upon moving into this next chapter of BIM & Revit in the industry

The move was a career choice to position myself with a group where I can see the greatest opportunities and challenges with BIM in the near future.

My industry vision for the next few years is that the next wave of Revit will turn to BIM as a focus in the industry, we are now seeing the first signs of Contractors & Stakeholders taking serious steps to implement BIM into their projects and consultants are now seeing BIM as a genuine project workflow to adopt.

I look forward to the challenges involved in building and supporting a team that can offer a true BIM service to the next generation of projects

More blogging soon...

Thursday, March 3, 2011

Australian/New Zealand Revit Standards now in Peer Review

Following a lengthy process, the Australian/New Zealand Revit Standards are nearing industry release

They have now been released for peer review, if you have taken part in the process thus far, whether it be through RTC2009 or through the AUSBIM website (now offline) or other channels you would have been invited to provide feedback on the draft document

The new website is up and running, with currently just a entry screen with a contact email

http://anzrs.org/


The peer review process will culminate in a session at RTC 2011 - Gold Coast, this session on the Saturday morning will be well worth attending if you want to take part in the finalisation of the first issue of this document

Thanks to all those people who have given time to making this document happen

Wednesday, March 2, 2011

Rev'it - Not what you expect

So I was search the inter-webs for some Revit links, and I somehow came across something unexcepted

http://www.revitaustralia.com.au/


Revit Australia, who are actually Rev'it, A motorcycle apparel company!

Who also sell, leather waterpoofing spray with Rev'it branding!

Sorry for the lapse in blog posts, some big things happening at the moment, more very details soon...

Wednesday, February 23, 2011

RTC Australasia 2011 - Gold Coast - Registration open


RTC (Revit Technology Conference) 2011 is now open for registration, it will run from Thursday the 26th of May until Saturday the 28th of May. This year it will be at none other than Jupiters Casino on the Gold Coast

The quality of sessions looks to be another level again this year, with notably longer LAB sessions

To ensure you get a spot in a LAB session, it would be a good idea to sign-up ASAP

Once again there are way too many good classes to choose from, but a couple that jumped out at me straight away are:

GenerativeComponents: "Capturing the Concept" -Lars Moth-Poulsen
A two hour LABS session!


Revit's Top Model - Conceptual Massing World -Stephen Taskin
Stephen in my opinion is one of the masters of complex forms, and I loved his class last year

Construction Families for Structures -Adam Sheather
Defiantly looking forward to seeing what Adam can do with families


Advanced Geometry -Phil Read
Not even a description yet, but this class should be good!

 And a little self promotion, I have a session on day one titled "Structural Families Overview'
This session will be targeted at all levels, and will go through every imaginable setting for structural specific families, and how they can change your documentation and model.

So don't wait, get on the website and book your seats now!

See you there..

Monday, February 14, 2011

Reset 3D viewpoint after orbit

Following on from my post about orient to view and using the steering/navigation wheel interface to gain access to more options, there is another neat feature only available through the navigation wheel

If you have ever created a snapshot 3D view that you want to place in your documentation, you have probably accidentally orbited in the view which would mess up the viewpoint you are after, but also affect any text you have placed in the view


3D view setup for documentation


Result after accidental orbit

A simple undo will not work unless you happened to change something else in the view at the same time, the simple orbit isnt recongnised by Revit otherwise

But you can reset the viewpoint through the steering wheel

Steering wheel undo option
You can also assign a hotkey to this command in your keyboard shortcuts, it is currently unassigned by default

As someone who doesn't use the navigation wheel, I would love to see this option added to the view cube

Wednesday, February 9, 2011

Orient to View - Weird Revit

Another year is well underway and we had our first REVIC (Revit Users Group of Victoria) meeting for the year on Tuesday night


The first topic of the year was on Visual Presentation, starting right at the nuts and bolts of view properties, Object Syles, VG overrides etc, through to workflows for Isometrics etc.

One thing that popped up again, was the amazement that people are not aware of the "Orient to View" tool in a 3D view

Whenever I am modeling in a project I am constantly using this tool to get a cropped 3D view of the area I am working on, instead of clumsily orbiting around a model that fills multiple sheets

Something that I have grown to accept though is that we only have the view options shown in the image below

Which is plans, elevations, sections & other 3D views, but no detail views...

Dont forget there is a difference between "Sections" & "Details"

 But at last nights REVIC meeting, a wise voice from the back of the crowd slipped in a secret that I certainly had not come across, when the "Steering Wheel" option was added Autodesk decided to change the way "Orient to View" works, and accessing it that way actually gives you a full list of views in the project, including detail views! See the image below


Unfortunately, it doesn't break down the list into sub-groups, which on larger projects leaves you thousands of views to sort through! But handy if you need a cropped view of a detail

Thanks for that one Chris!

Monday, February 7, 2011

Structural Connection Families - Hidden Lines

Working more and more with 3D connections, something that has always been a little odd to me is that Structural Connection families dont behave how you would expect

A very common but simple connection detail is highlighted below, a simple cleat plate connection (cleat highlighted in red)

3D view of face hosted cleat plate, with family set to "Structural Connection"
 If we then cut a section or take a callout at the far face of the connection at the connection location, we dont see the cleat plate. It doesnt matter how we configure the view settings, the cleat plate will not show. Ideally the cleat plate would show automatically following the functionality of all other "Structural" elements when set to a view discipline of structural
Section or callout taken at connection location


 So the next approach I try is to set my discipline to "Co-ordination" which allows me to use "Show Hidden lines"

But with the family set to "Structural Connections" I cannot actually select the cleat plate family, it is simply not able to be used with "Show hidden lines"

If I then edit my cleat plate family, and set the family category to "Generic Model" show hidden lines will work
Example of hidden lines displaying when set to "Generic Model"
 This workflow is something that I have used without stopping to ask why it doesnt work as "Structural Connection" but recently I submitted it to Autodesk support, I am likely not the first, hopefully we can see a fix in the near future

Wednesday, February 2, 2011

AUBench - Workstation Benchmarking

Going back a few years now there was quite a following on AUGI with the technically minded Revit users sharing a benchmarking journal file, I dont know the exact origins, but I believe Phil Read first presented it at AU2007 which was when it first appeared on AUGI <Original AUGI Link>

The way it works, is you can essentially take any Revit Journal file, which is a log of each command in a Revit session, which you can then add markers and timing points which will write to a text file once complete. You can then use the identical test file on different machine builds to compare the results of time taken for each task

Over the years I have used the principals from the original AUGI AUbench files and created my own structural specific benchmark tests with my own custom Journal files. It was a huge help in creating our current spec of machines, testing actual tasks on each spec machine and seeing results was a great thing for the IT management to have in front of them when speccing the machines.

Recently over at revitforum.org, the AUbench has taken a new life, with a new standard benchmark file, with a new neat addition of a script file which will run the test multiple times and then create a results file showing the average times from the test.

Check out the thread here  http://www.revitforum.org/showthread.php?351-New-AUBench


Unfortunately, For RST users, the standard benchmark journal will crash at the change curtain panel type point of the journal file, you can remove this section and it all works fine. But your times are only comparable for the first sections of the Journal file compared to the Architecture results

A copy of the modified RST version of the benchmark file can be found in this <Post>

You also need to ensure that PressDrag is enabled in your Revit.ini file, there are plenty of blog posts about setting this if you are unsure

It might just be the help you need to convince the boss of an upgraded machine

Friday, January 28, 2011

Missing Keyboard Shortcuts Dialog

A strange bug with Revit 2011 appeared this week, it was a deja-vu moment, from the 2010 release. Activating the keyboard shortcuts from either the ribbon panel or the options dialog wouldn't bring up the dialog window

The only way to get it going again is to hit ESC and all is back to normal, but no shortcuts..

Thinking about the fix for 2010, it was something to do with a corrupt Revit system file being the UIstate.dat file

After playing around with it for a while with no success, it is obvious that it is actually a Windows OS bug

The dialog was coming up, but the workstation had dual screens, and the dialog must have been in the lost space somewhere inbetween the two screens

This particular user also had his Revit window on the Non Primary screen by deafult. So I disconnected the secondary screen, and forced the current screen to be Primary, this pushed the Keyboard Extensions window back onto the single screen. Once I connected the 2nd screen again, the dialog came up fine

I think it is linked to having Revit on the Non-Primary screen, but with plenty of users working this way without a problem I am not sure what triggers the issue

Certainly one to note

Wednesday, January 19, 2011

Structural Elevations Revisted

Some days you come across a task in Revit that makes you remember this is still based on a tool built for Architects

Elevations are hugely efficient in Revit, but on a structural drawing you generally want to show all structural elements in the foreground (cut plane and projection lines) and elements behind (hidden lines)

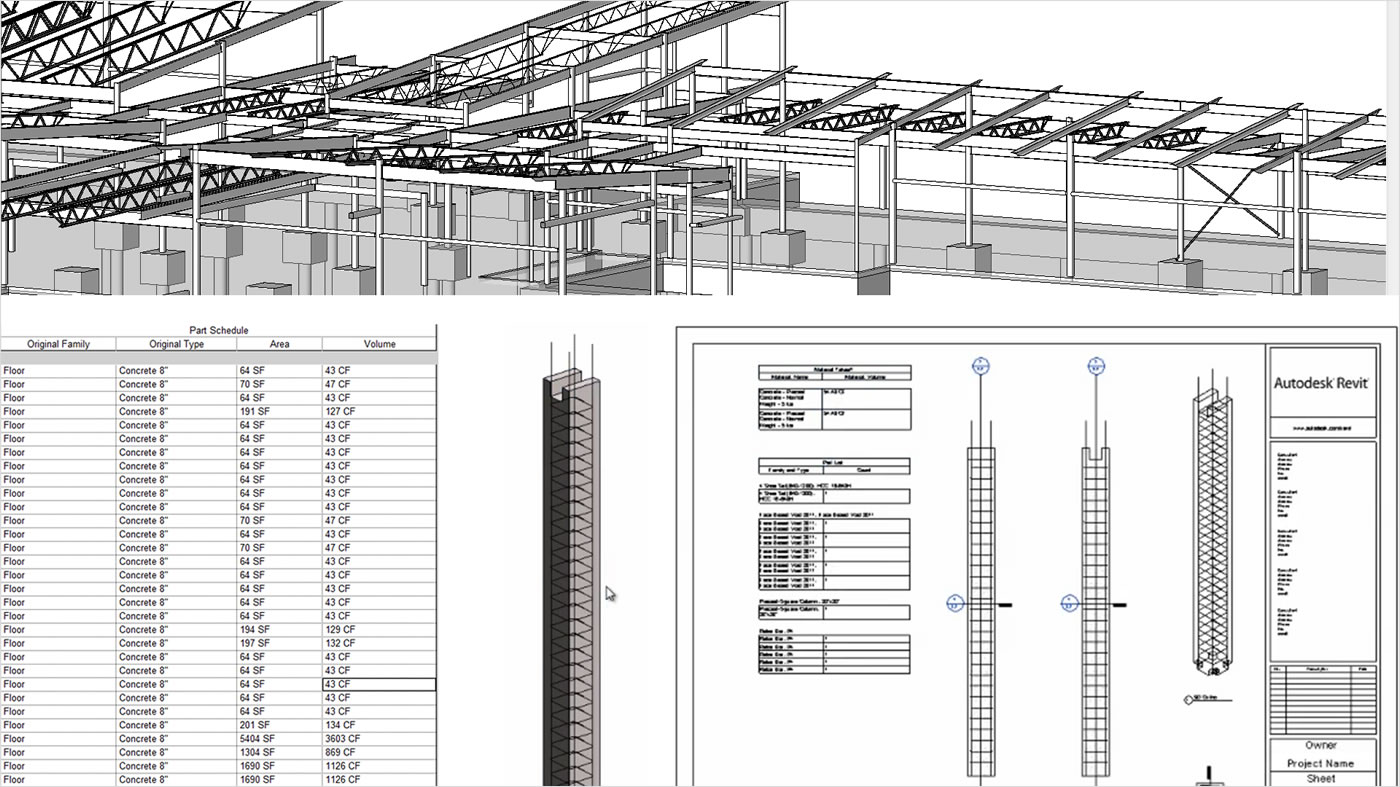
Example of linework for core elevation


However, Elevations in Revit will not show hidden lines.. automatically at least

So at first you wonder what this RST (Revit Structure) tool "Framing Elevation" can offer, unfortunately it doesn't help us with our hidden lines

But what does it actually do?

Framing Elevation, allows you to create an elevation based on a grid line.

But in doing this it will also do a couple of handy things that will speed up creating elevations
  • It will create the elevation extents more localised -according to Autodesk help it will look for perpendicular grids, but my experience is that it actually looks for columns 
Example of default framing elevation clip extents


    •  It will set the current workplane in the view to the selected grid. Useful if you want to model brace framing to the grid as a workplane
    You will also notice in RST that if you select the attach to grid option, it automatically changes the elevation type to a "Framing Elevation" even if you think you are starting from Building Elevation -easy to miss!

     But getting back to those hidden lines, once you have created your elevation you really want hidden lines

    Although there is a better solution yet, I will explain the workflow for elevations first
    With elevations, the best workflow is to use the "Show hidden lines" which is now located on the View-Ribbon Panel (previously in 2010 on the modify panel)

    But for this to work, you actually need to set your view discipline setting to co-ordination. You can even set your discipline view setting back to structural once you have revealed the hidden linework...

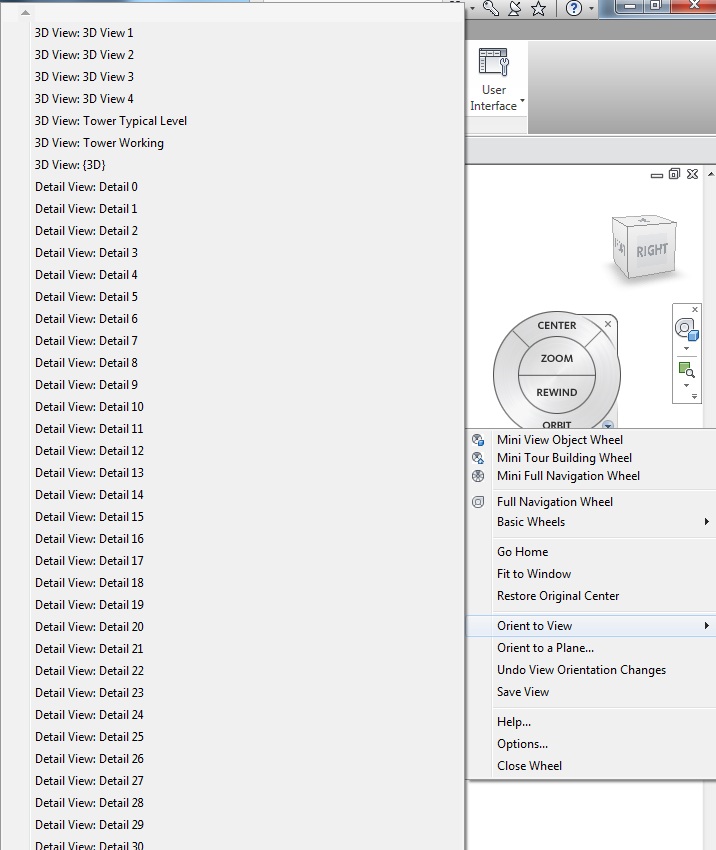
    Screen shot of settings and result

    This needs to be done for each wall to reveal the elements behind, but you can activate a multiple selection which lets you pick everything behind in a window.

    Very tedious for large amounts of elevations..

    So why not just use sections...

    Sections can give you the same result, with hidden lines shown automatically

    One initial downside to this approach is that fact that you cant easily represent the elevation mark with a section head effectively. You can modify the section mark head to look similar but positioning it can be quite a hassle. You may even consider using wall mark tags instead, or... cover your ears BIM gods... manual symbol marking plans...

    Another issue, which is quite frustrating on core elevations, is that stairs do not show hidden lines through walls
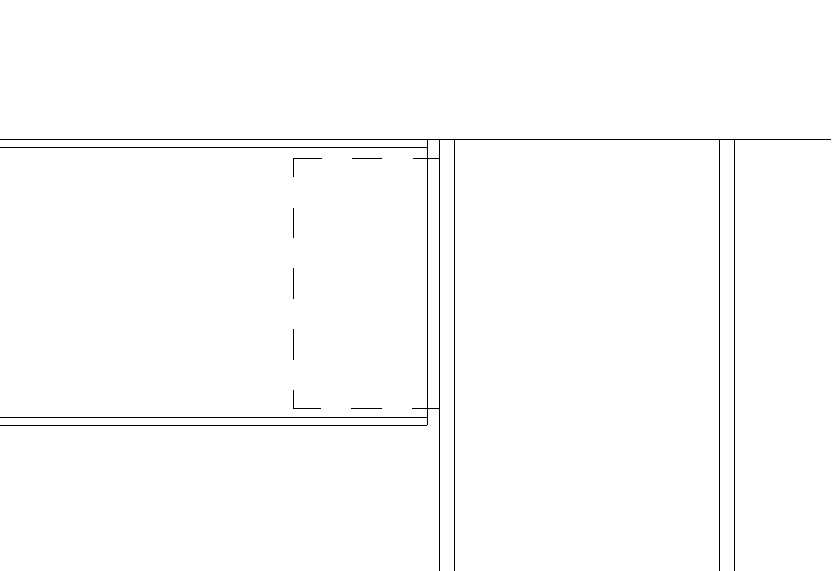
    Elevation cut with section - Stair Missing

    Desired elevation
    Using sections, we automatically get our floors, framing foundations etc. but stair are missing.

    The stair is actually there, and selectable, but it will not show through

    One work-around suitable for smaller projects, you can actually use the linework tool to reveal the hidden lines. It will be linked to the stair geometry, so it will remain live with the stair, unless the risers change the linework will follow. The downside to this is, you cannot even TAB to select the chain of lines, you need to individually pick each tread, landing, soffit...

    Which leaves large projects, it may be worth considering a different approach, particaurlarly if you have multiple cores with mutliple stairs that will inevitably evolve throughout the project

    Summing up, Elevations have their place certainly, and where your hidden lines are limited, revealing them manually may be a suitable approach, but for large amounts of elevations with lots of hidden linework Sections look to be a good workflow

    Interested to hear any opinions..

    Cheers..

      Friday, January 14, 2011

      Etabs link for Revit 2011

      Early last year I chased up the ETABS people regarding an update to their Revit Add-In for 2011
      I had been using it pretty successfully with 2010 and it seemed a lot better than trying to work simply with IFC or DWG exports

      I was promised something before the end of 2010, well I got it, on New Years Eve at 7:30 in the morning (so technically) the day before if it was sent from the states

      But they seem to have changed the way it works, or at least how it obtains a license

      Over here in OZ, typically we dont let Engineers near a Revit model so we dont generally install Revit on their machines, the old export tool from ETABS was just an ADD-IN to Revit, but it did require a license from the server to function, and if there was none free you had to kick an Engineer off to export

      So ETABS have now made the export program standalone from the network license, BUT you now have to fork out $500 for it!


      We are doing quite a bit with it, so it may be worth our while. But for the average company has already forked out a few grand for the software, you would hope they can through in the export program!

      They provide a 30 day trial for free, I haven't had a chance to test out the new link, so I will report back with more details once I get a chance

      There is nothing on the website about the 2011 version last time I looked, so if you are interested in trying it out contact ETABS directly or your reseller

      http://www.csiberkeley.com/Revit/

      Thursday, January 13, 2011

      Back to work - Another Year

      First week back at work is over, and the motivation is slowly returning after a few weeks off over Xmas

      I started back on Monday, and as usual the first few days seem to be neverending after a few weeks off it takes a while to get back into a routine, but once new projects start and you get back into the groove it very quickly feels like you never actually had a break....

      Looking forward to a great year in 2011

      More soon